


Hey wassup, Welcome! I'm Zion
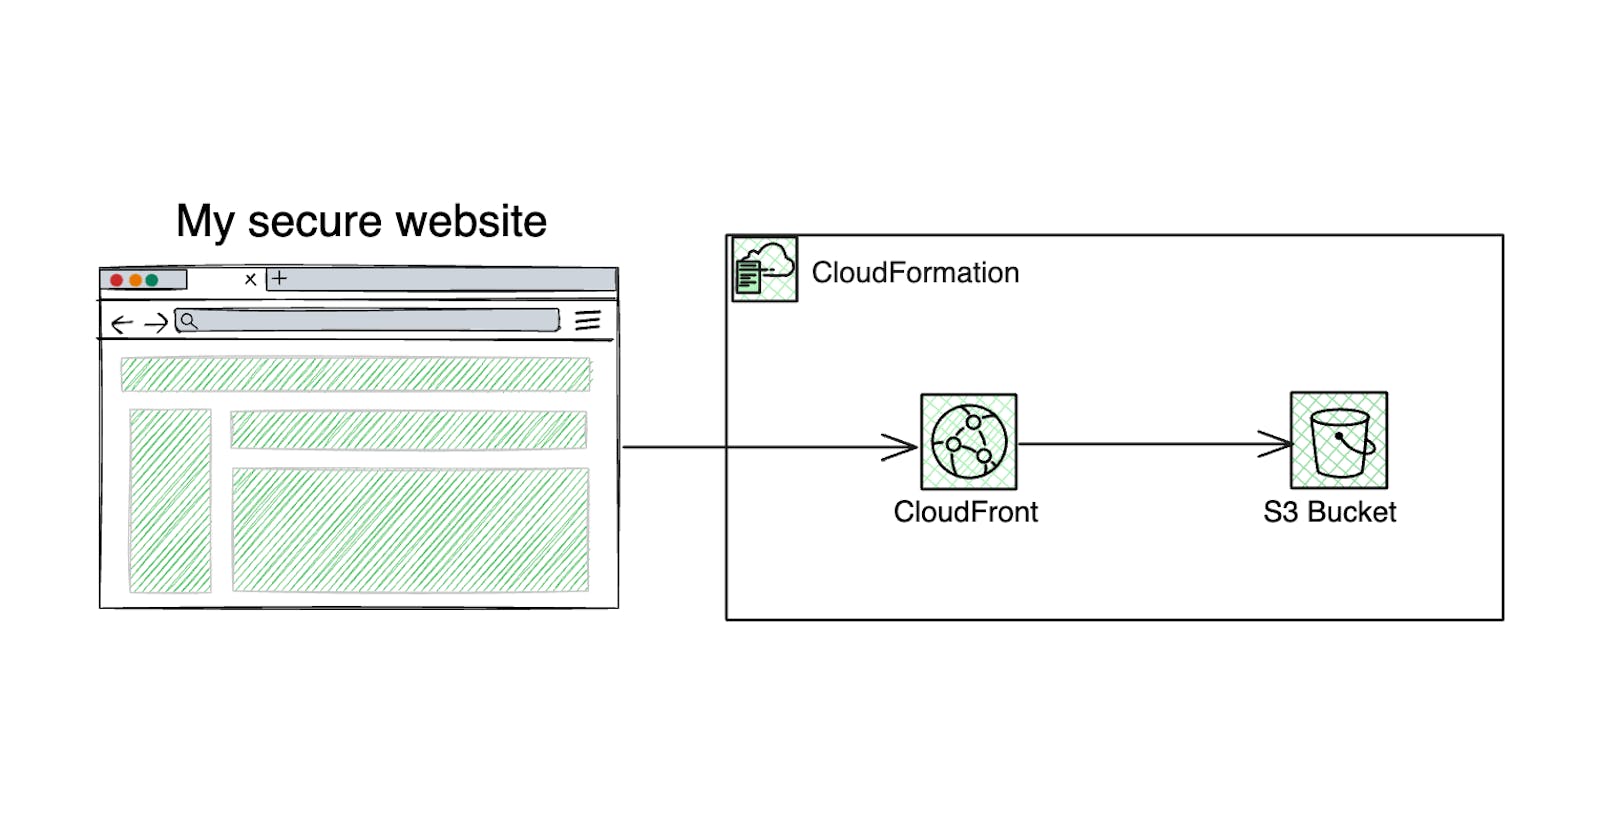
I am sure we all know the amazing powers of Amazon Simple Storage Service (S3). One of the most common use cases for S3 is simple website hosting. Website hosting on Amazon S3 is very common, and it is one of the many capabilities of this amazing service that most beginners learn about. In this blog post, we are going to explore a different approach.
The security of your static content that is served via your S3 bucket is very important, and Amazon S3 makes it possible for you to block public access to your bucket for your static content. There are better ways to serve the static content stored in your bucket using AWS CloudFront. CloudFront requires some initial setup, and once you have set it up, it works together with your website or application and speeds up the delivery of your content.
In this blog, you are going to explore the Amazon CloudFront service with Amazon S3 for simple website hosting. To make it more fun, you will do it all using Infrastructure as Code (IaC).
Before we begin, we are going to look at some AWS services and technologies that you will see later as you read through.
Amazon CloudFront is a content delivery network (CDN) service built for high performance, security, and developer convenience
Amazon Simple Storage Service (S3)
Amazon S3 is an object storage service that offers scalability, data availability, security, and performance.
AWS CloudFormation lets you model, provision, and manage AWS and third-party resources by treating infrastructure as code.
Integrated Development Environment (IDE)
An integrated development environment (IDE) is a software application that helps programmers develop software code efficiently. I recommend you use VSCode for this workshop.
Before proceeding, please make sure you have the below technologies installed and configured properly.
AWS Account with Admin Access
Create a CloudFormation template
Here, you will create a CloudFormation template, which will build the resources you need for this workshop.
Open your VSCode and open a new blank text file. This is where you will write your
yamlcode for your CloudFormation template.In the blank text file, copy and paste the following code:
AWSTemplateFormatVersion: '2010-09-09'
Description: '(Cloudfront-as-default-00) Simple CloudFront distribution with an S3 origin'

Resources:
  S3Bucket:
    DeletionPolicy: 'Delete'
    Metadata:
      Comment: 'Bucket to store some data'
    Properties:
      AccessControl: 'Private'
      BucketName: !Sub 'cf-simple-s3-origin-${AWS::StackName}-${AWS::AccountId}'
    Type: 'AWS::S3::Bucket'

  S3BucketPolicy:
    Metadata:
      Comment: 'Bucket policy to allow cloudfront to access the data'
    Properties:
      Bucket: !Ref S3Bucket
      PolicyDocument:
        Statement:
          - Action:
              - 's3:GetObject'
            Effect: 'Allow'
            Principal:
              CanonicalUser: !GetAtt CfOriginAccessIdentity.S3CanonicalUserId
            Resource:
              - !Sub 'arn:aws:s3:::${S3Bucket}/*'
    Type: 'AWS::S3::BucketPolicy'

  CfDistribution:
    Metadata:
      Comment: 'A simple CloudFront distribution with an S3 origin'
    Properties:
      DistributionConfig:
        Comment: 'A simple distribution with an S3 origin'
        DefaultCacheBehavior:
          AllowedMethods:
            - 'HEAD'
            - 'GET'
          CachedMethods:
            - 'HEAD'
            - 'GET'
          Compress: false
          DefaultTTL: 86400
          ForwardedValues:
            Cookies:
              Forward: 'none'
            Headers:
              - 'Origin'
            QueryString: false
          MaxTTL: 31536000
          MinTTL: 86400
          TargetOriginId: !Sub 's3-origin-${S3Bucket}'
          ViewerProtocolPolicy: 'redirect-to-https'
        DefaultRootObject: 'index.html'
        Enabled: true
        HttpVersion: 'http1.1'
        IPV6Enabled: false
        Origins:
          - DomainName: !GetAtt S3Bucket.DomainName
            Id: !Sub 's3-origin-${S3Bucket}'
            OriginPath: ''
            S3OriginConfig:
              OriginAccessIdentity: !Sub 'origin-access-identity/cloudfront/${CfOriginAccessIdentity}'
        PriceClass: 'PriceClass_All'
    Type: 'AWS::CloudFront::Distribution'

  CfOriginAccessIdentity:
    Metadata:
      Comment: 'Access S3 bucket content only through CloudFront'
    Properties:
      CloudFrontOriginAccessIdentityConfig:
        Comment: 'Access S3 bucket content only through CloudFront'
    Type: 'AWS::CloudFront::CloudFrontOriginAccessIdentity'

Outputs:
  S3BucketName:
    Description: 'Bucket name'
    Value: !Ref S3Bucket
  CfDistributionId:
    Description: 'Id for our cloudfront distribution'
    Value: !Ref CfDistribution
  CfDistributionDomainName:
    Description: 'Domain name for our cloudfront distribution'
    Value: !GetAtt CfDistribution.DomainName
Let's Explore the resources in the cloudformation template
Amazon S3
The first resource you created was an S3 bucket.
The AWS::S3::Bucket resource creates an Amazon S3 bucket in the same AWS Region where you create the AWS CloudFormation stack.
Resources:
  S3Bucket:
    DeletionPolicy: 'Delete'
    Metadata:
      Comment: 'Bucket to store some data'
    Properties:
      AccessControl: 'Private'
      BucketName: !Sub 'cf-simple-s3-origin-${AWS::StackName}-${AWS::AccountId}'
    Type: 'AWS::S3::Bucket'
S3BucketDefines an S3 bucket resource.DeletionPolicyspecifies the deletion policy for the bucket; the 'Delete' policy means the bucket is deleted when the stack is deleted.Metadataprovides additional metadata for the resource. Here you have put a comment to explain what the bucket is for: 'Bucket to store some data’.AccessControlThis is one of the properties for your bucket, It sets the access control for the bucket to 'Private.'BucketNameuses the!Subfunction to dynamically generate the bucket name based on the stack name and AWS account ID.Typespecifies the resource type, in this case, an S3 bucket.
Amazon S3 bucket policy
The code block defines the S3 bucket policyfor your S3 bucket.
A bucket policy is a resource-based policy that you can useto grant access permissions to your Amazon S3 bucket and the objects in it.
S3BucketPolicy:
    Metadata:
      Comment: 'Bucket policy to allow cloudfront to access the data'
    Properties:
      Bucket: !Ref S3Bucket
      PolicyDocument:
        Statement:
          - Action:
              - 's3:GetObject'
            Effect: 'Allow'
            Principal:
              CanonicalUser: !GetAtt CfOriginAccessIdentity.S3CanonicalUserId
            Resource:
              - !Sub 'arn:aws:s3:::${S3Bucket}/*'
    Type: 'AWS::S3::BucketPolicy'
S3BucketPolicydefines a bucket policy to grant CloudFront permission to access S3 objects.Metadataprovides additional metadata for the resource. in this case, it’s providing a simple commentBucketThis is a property of your bucket policy; it is referencing the S3 bucket created earlier.PolicyDocumentis another property of your policy; it defines the policy allowing S3 to GetObject for CloudFront Origin Access Identity on objects in the bucket.
Type Specifies the resource type as an S3 bucket policy.
CloudFront distribution
A distributiontells CloudFront where you want content to be delivered and the details about how to track and manage content delivery
CfDistribution:
    Metadata:
      Comment: 'A simple CloudFront distribution with an S3 origin'
    Properties:
      DistributionConfig:
        Comment: 'A simple distribution with an S3 origin'
        DefaultCacheBehavior:
          AllowedMethods:
            - 'HEAD'
            - 'GET'
          CachedMethods:
            - 'HEAD'
            - 'GET'
          Compress: false
          DefaultTTL: 86400
          ForwardedValues:
            Cookies:
              Forward: 'none'
            Headers:
              - 'Origin'
            QueryString: false
          MaxTTL: 31536000
          MinTTL: 86400
          TargetOriginId: !Sub 's3-origin-${S3Bucket}'
          ViewerProtocolPolicy: 'redirect-to-https'
        DefaultRootObject: 'index.html'
        Enabled: true
        HttpVersion: 'http1.1'
        IPV6Enabled: false
        Origins:
          - DomainName: !GetAtt S3Bucket.DomainName
            Id: !Sub 's3-origin-${S3Bucket}'
            OriginPath: ''
            S3OriginConfig:
              OriginAccessIdentity: !Sub 'origin-access-identity/cloudfront/${CfOriginAccessIdentity}'
        PriceClass: 'PriceClass_All'
    Type: 'AWS::CloudFront::Distribution'
CfDistributiondefines a CloudFront distribution with an S3 origin.Metadataprovides additional information about the resource.DistributionConfigconfigures the CloudFront distribution.DefaultCacheBehaviorconfigures caching and behavior for default requests.Specifies allowed and cached methods, compression, TTL settings, and more.
Forwards certain headers and handles cookies.
Specifies the S3 origin and redirects HTTP to HTTPS.
DefaultRootObjectspecifies the default root object.Enabledindicates whether the distribution is enabled.HttpVersionspecifies the HTTP version.IPV6Enabledindicates whether IPv6 is enabled.Originsthis configures the S3 origin for the distribution.PriceClassspecifies the price class for the distribution.Typespecifies the resource type as a CloudFront Distribution
CloudFront origin access identity (OAI)
An Origin Access Identityis a special CloudFront user that you can associate with Amazon S3 origins to secure all or just some of your Amazon S3 content.
CfOriginAccessIdentity:
    Metadata:
      Comment: 'Access S3 bucket content only through CloudFront'
    Properties:
      CloudFrontOriginAccessIdentityConfig:
        Comment: 'Access S3 bucket content only through CloudFront'
    Type: 'AWS::CloudFront::CloudFrontOriginAccessIdentity'
CfOriginAccessIdentitydefines a CloudFront Origin Access Identity (OAI).CloudFrontOriginAccessIdentityConfigconfigures the CloudFront OAI.Commenta comment describing the purpose of the OAI.
Typespecifies the resource type as a CloudFront Origin Access Identity.
Outputs
Here, you declare the output values of your stack which you can view in your console.
Outputs:
  S3BucketName:
    Description: 'Bucket name'
    Value: !Ref S3Bucket
  CfDistributionId:
    Description: 'Id for our cloudfront distribution'
    Value: !Ref CfDistribution
  CfDistributionDomainName:
    Description: 'Domain name for our cloudfront distribution'
    Value: !GetAtt CfDistribution.DomainName
Outputsshow information about the created resources.S3BucketNameoutputs the name of the S3 bucket.CfDistributionIdoutputs the ID of the CloudFront distribution.CfDistributionDomainNameoutputs the domain name of the CloudFront distribution.
Upload and deploy your CloudFormation Template
You created your template. It’s now time to deploy your template to the cloud.
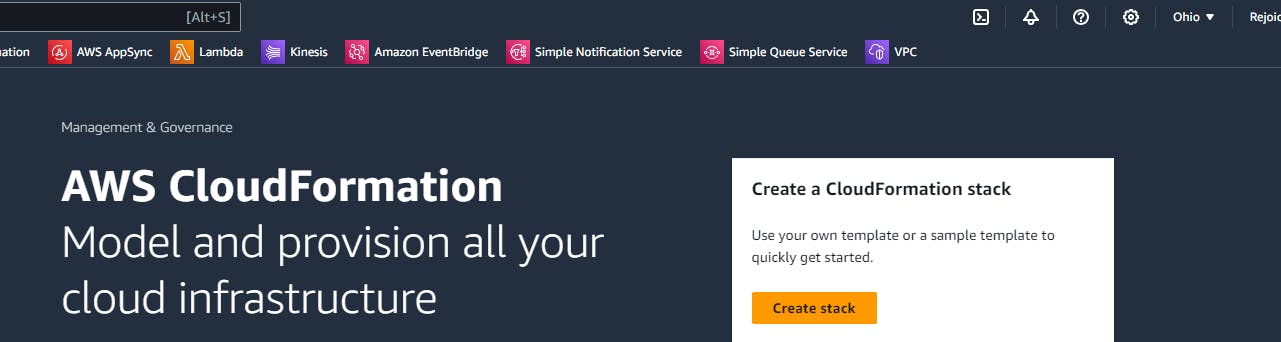
Go to your AWS account and navigate to the CloudFormation console.
From your CloudFormation console click on Create Stack.
From the Create Stack panel, Select Template is ready
Under the Specify template panel, Select Upload a template file.
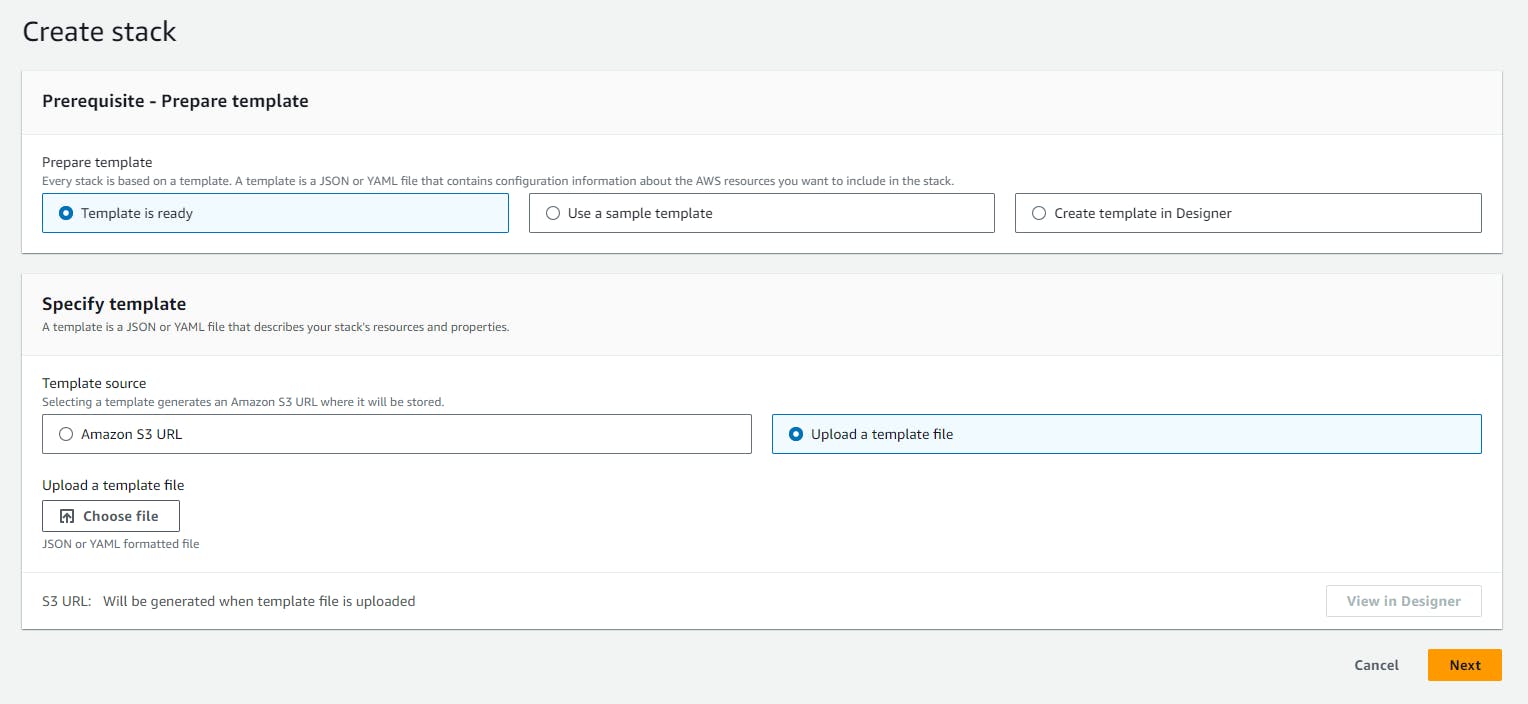
You should have a page like the image above.
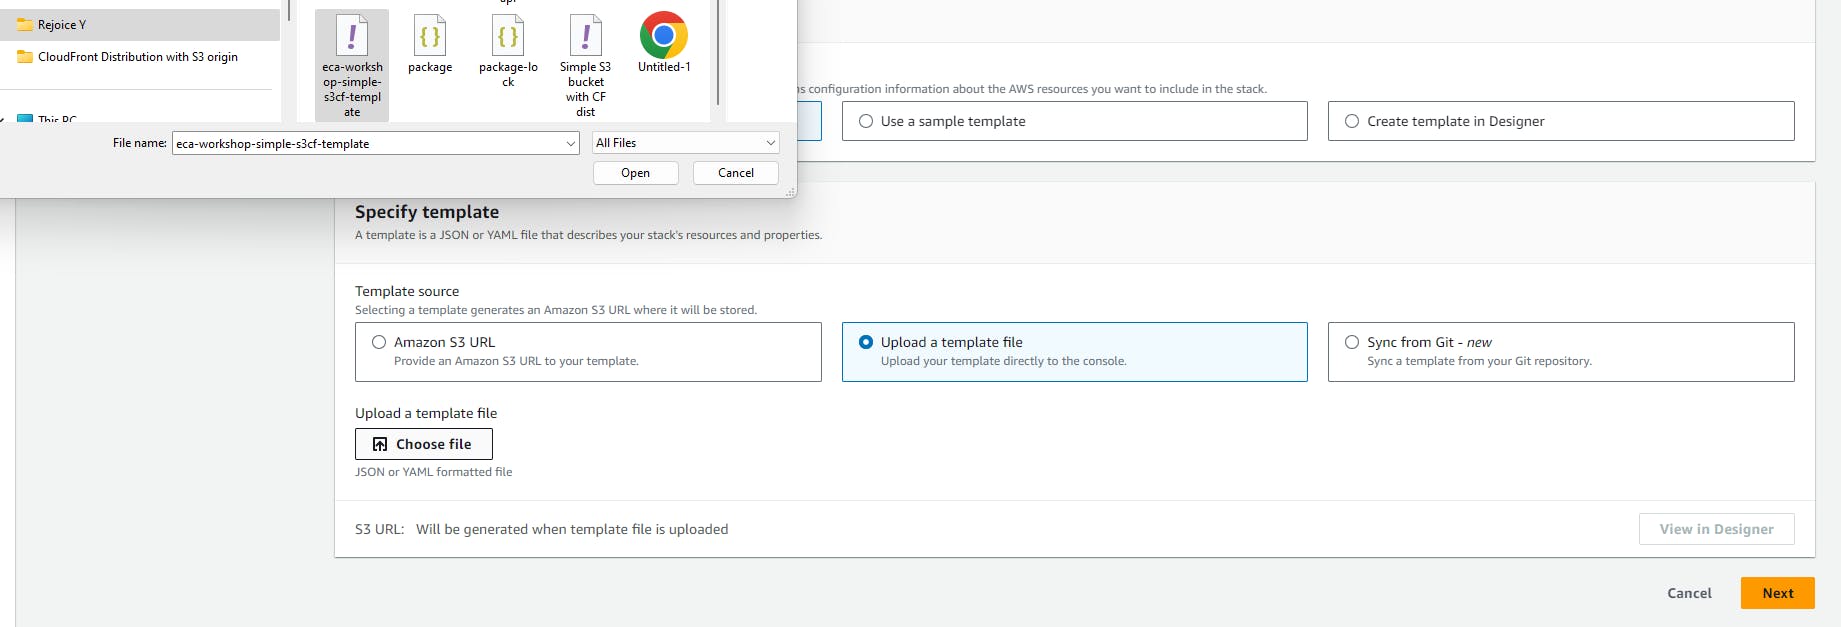
Go back to VSCode and save the text file of the CloudFormation YAML code you created. You can save it with any name you want.
Once your
.yamlfile is saved. Click Choose file to upload the file to the CloudFormation console and click Next.
In the Specify stack details page, enter your Stack name then click Next.
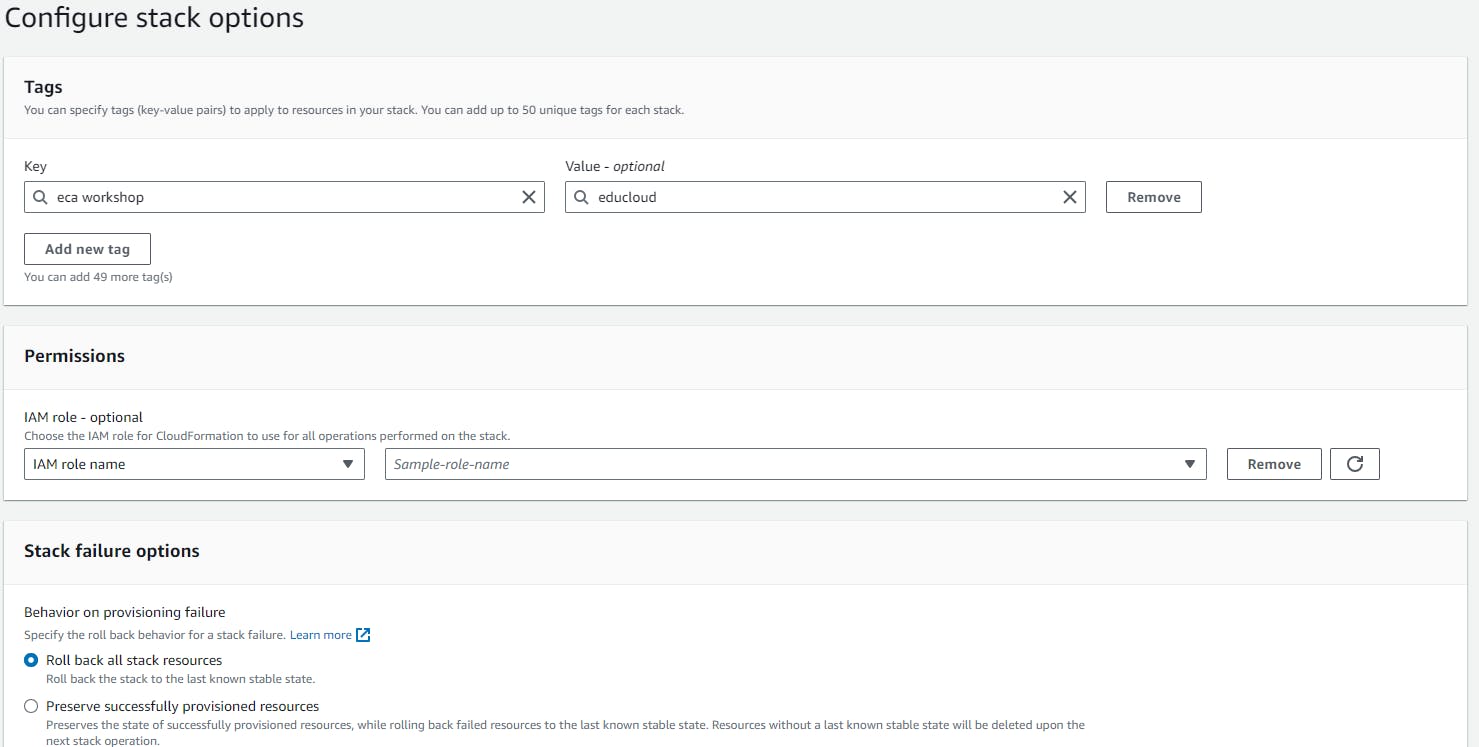
In the Configure stack options page, you will leave everything as default. You can create tags for your stack. Tags are a way for you to be able to manage, identify, organize, search for, and filter resources, in a way, you can say tags are metadata assigned to your AWS resources.
Review your stack, scroll down, and click Submit.
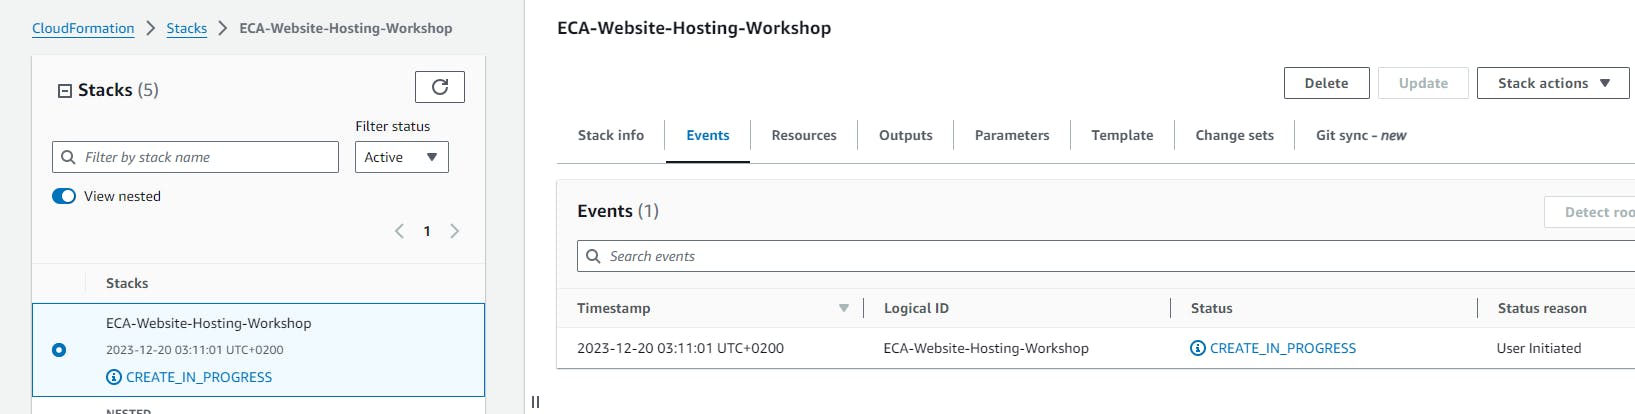
- Your stack should show as CREATE_IN_PROGRESS, it may take some time for your stack to create all the resources. Wait for your stack to show as CREATE_COMPLETE
Confirm resource creation
Your stack has been successfully created. The next step is to confirm that all the resources were
created and deployed in the cloud.
Navigate to the S3 console by typing S3 in the search bar.
From the search results click S3 to proceed to the S3 console.
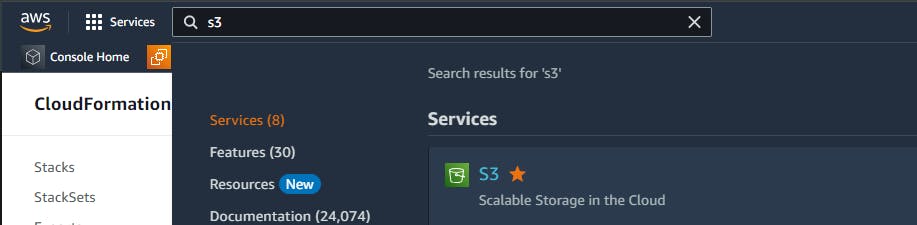
- You should see your S3 bucket under your buckets list, it would be the one that ends with your AWS account number in the name.

Navigate to CloudFront, and click CloudFront in the search bar.
From the search results click Cloudfront to proceed to the CloudFront console.
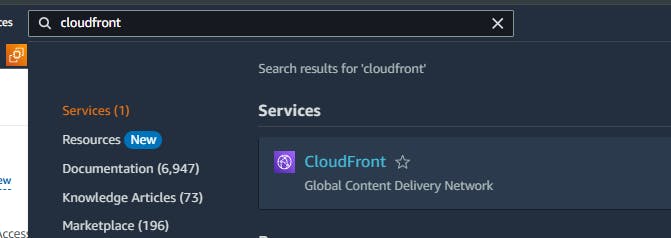
- On the Distributions page, you should see your CloudFront distribution that was created by CloudFormation.

Web Hosting
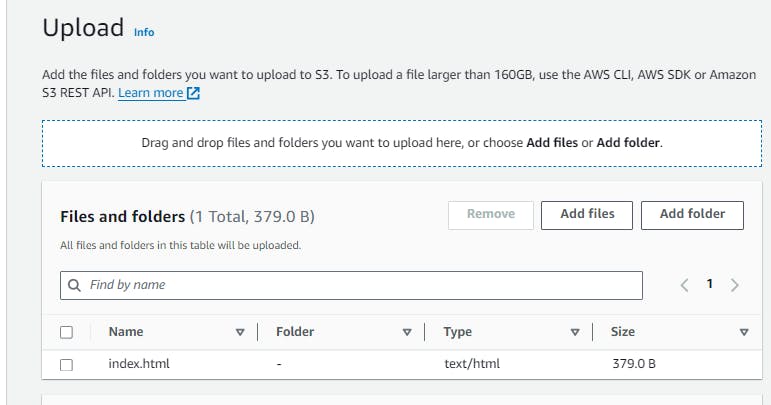
- Open the S3 console, and then upload this
html.indexfile to the S3 bucket that CloudFormation created. You can download the file here and save it to your local machine first.
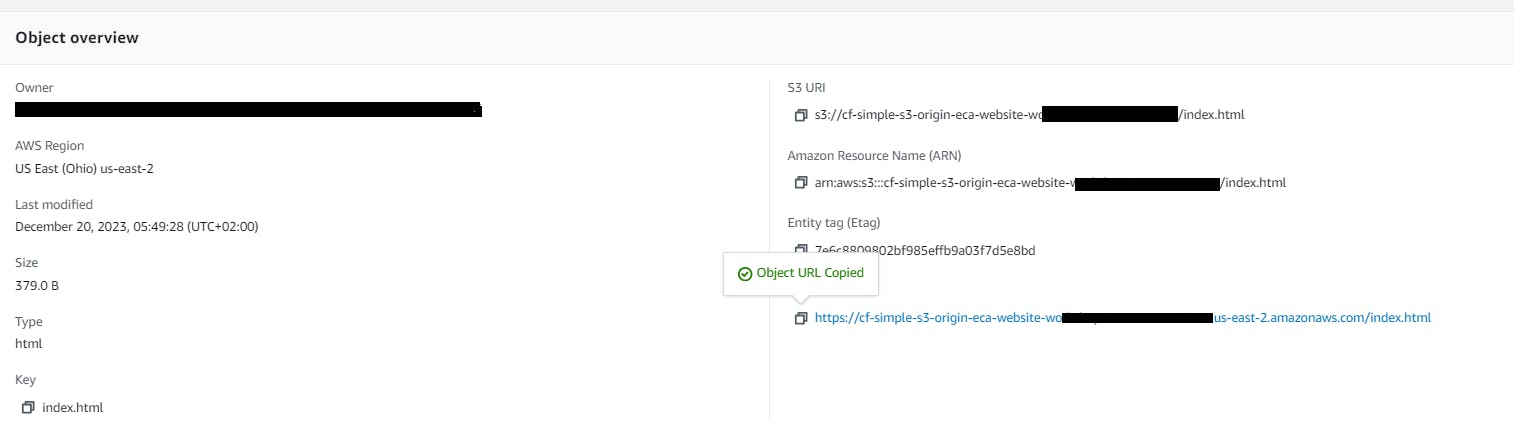
- Once uploaded, open the file and try to view it. Copy the object URL and paste it into a new tab in your web browser.
- Files in the bucket are not publicly accessible directly from S3, so you’ll see a message similar to the image below.
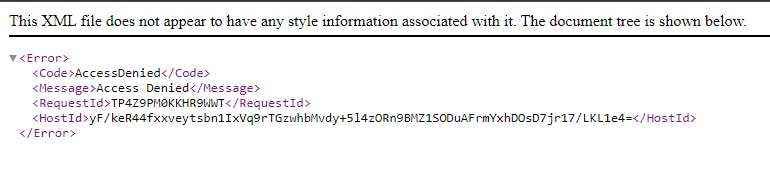
You will not be able to view the content directly from S3 because you specified to use the Origin Access Identity feature in Cloudfront. Now let’s see how that will work.
Open the CloudFront console and open the distribution you created with Cloudformation.
Copy the Distribution domain name and paste it into a new tab in your web browser.
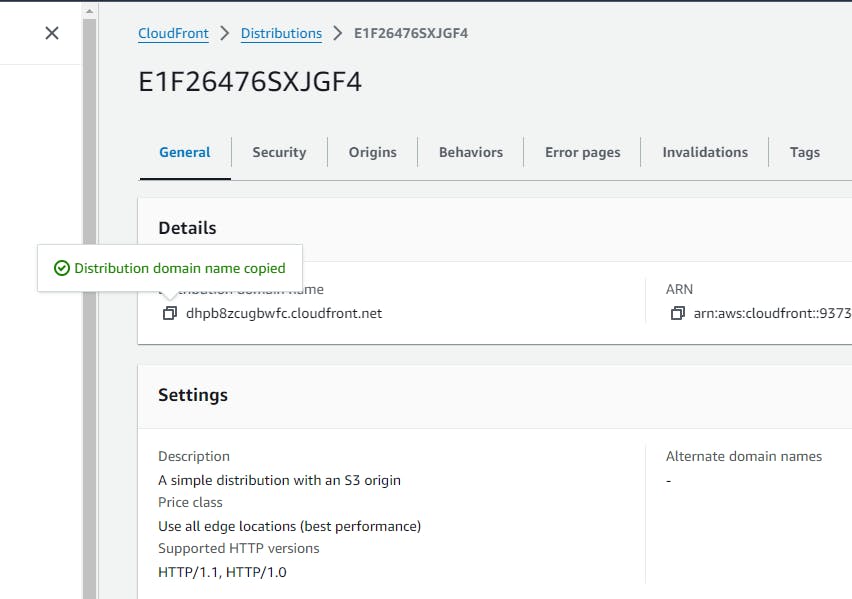
- You configured your files to be accessed via the CloudFront distribution. You should have an output like the image below.
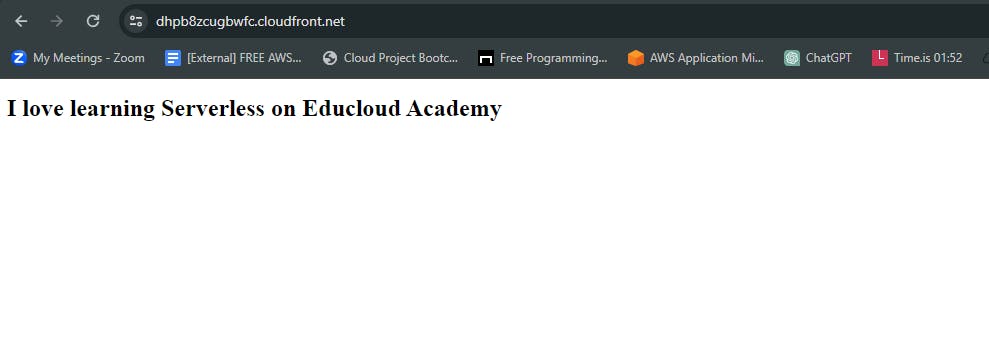
Congratulations! You have successfully configured a CloudFront Distribution with Amazon S3 origin.
Conclusion
In this workshop, you learned how to store, secure, and deliver your static content at scale.
This is a great feature for website hosting.
You made use of CloudFront, a content delivery network (CDN) service that delivers static and dynamic web content, video streams, and APIs around the world securely and at scale.
By design, delivering data out of CloudFront can be more cost-effective than delivering it from S3 directly to your users.
For more content like this checkout educloud.academy